Configuration
This section will cover how to get Dissonance running in it’s default configuration. If you’ve already done that, skip to the Extra Setup section.
What you need
- Administrator access to the Minecraft and Discord servers you are connecting
-
- On Minecraft, you need editing access to the
config/dissonance-server.tomlfile (and access to the console, preferably)
- On Minecraft, you need editing access to the
-
- On Discord, you need permissions to invite the bot and give it several permissions (send messages, manage webhooks, etc.)
Installing the Mod
Head over to the Modrinth page and download the latest release for either NeoForge or Fabric, then drop it in your server’s mods folder.
Discord Preparation
- Go to the Discord Developer Portal and sign in
- Click the
New Applicationbutton and name it whatever you want
While you’re in the
General Informationtab, you can set the bot’s description, which will show up in itsAbout Metab.

- On the left-hand side, click
Bot.
While you’re here, you can set the bot’s profile picture and banner if you’d like!
- Click
Reset Token, make sure to write this down somewhere since we’ll need it later

- Find the
Privileged Gateway Intentssection and check both theServer Members Intentand theMessage Content Intent - Click
Save Changesat the bottom.
-
Again, on the left sidebar, navigate to
OAuth2. -
Find the
OAuth2 URL Generatorand check thebotscope in the large grid of checkboxes.
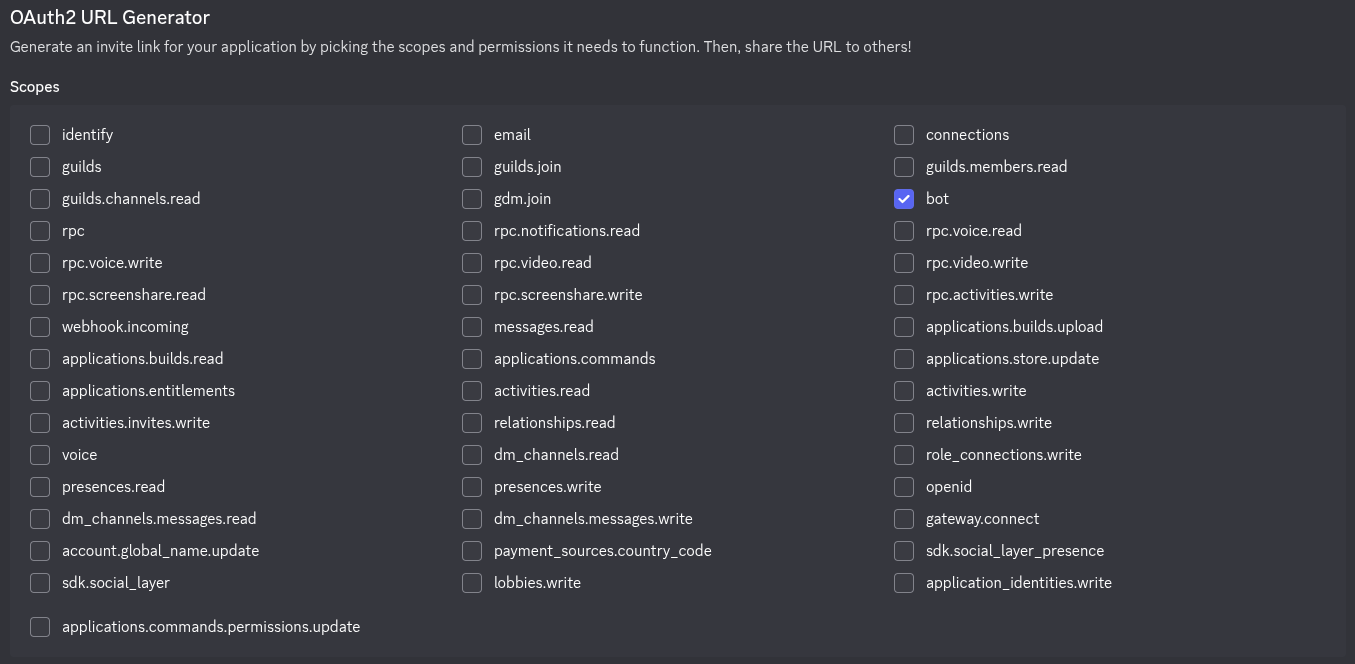
- Scroll to the
Bot Permissionssection and enable the following permissions:
- Manage Channels (required for proximity chat)
- Manage Webhooks (required to setup webhooks automatically)
- View Channels
- Send Messages
- Manage Messages (required for
/dissonance purge) - Embed Links
- Move Members (required for proximity chat)
- Mute Members (suggested for proximity chat)
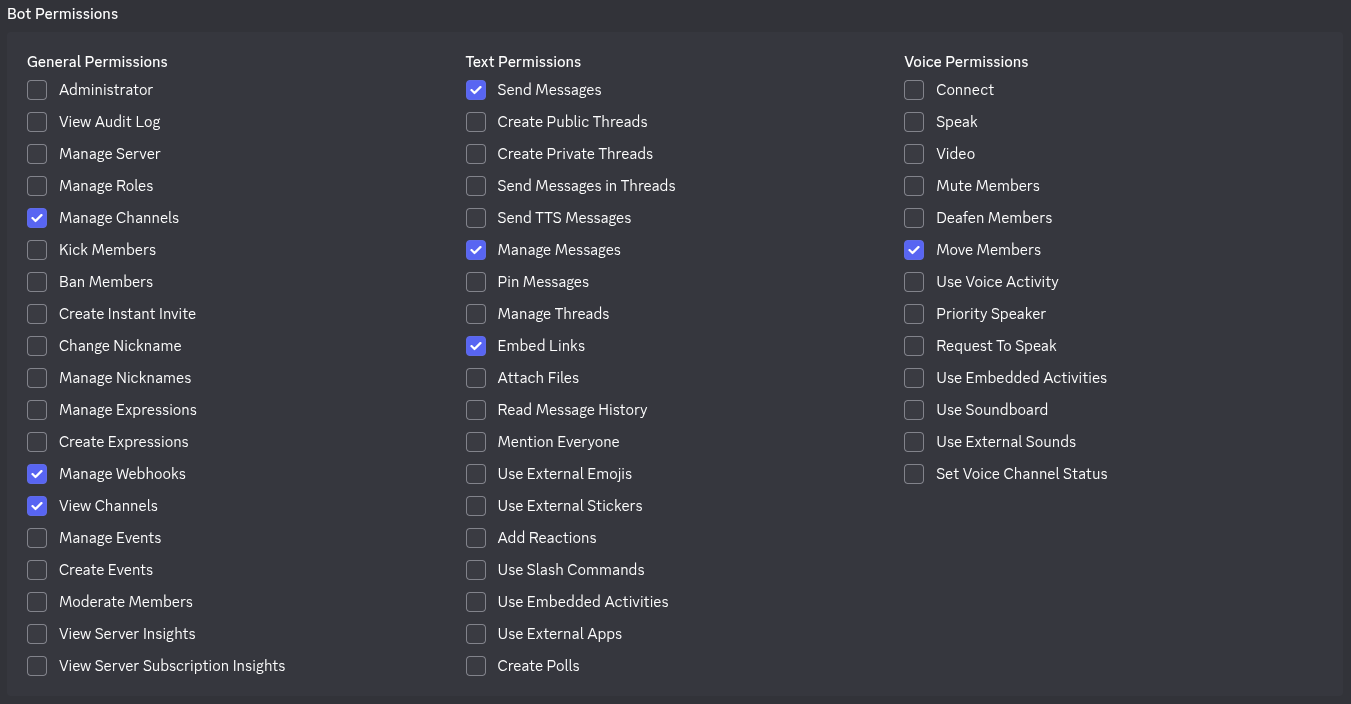
Although, it’ll work fine if you just give it
Administrator, it’s generally good practice to be specific with permissions. I won’t stop you, though.

- Copy and open the
Generated URL

- Select your Discord server, select
Continue, thenAuthorize - Open Discord and navigate to your server
- Go to
User Settings(the cog towards the bottom left), scroll down toAdvanced(underApp Settings), and checkDeveloper Modeif it’s not enabled already.

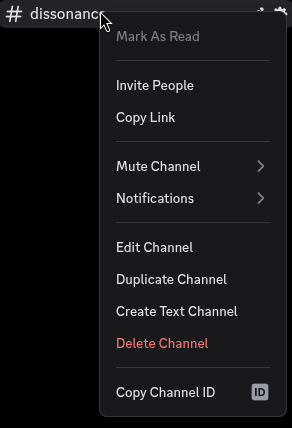
- Create or select a text channel and right-click the channel. Click
Copy Channel IDand write it down
Configuring the mod
- Either start the server once or create
config/dissonance-server.tomlwith this snippet:
[credentials]
	token = "DISCORD_TOKEN"

[discord]
	input_channels = [CHANNEL_ID]
	output_channel = CHANNEL_ID
Don’t worry, there are plenty more configuration options available! This is just the minimum you need to get everything working.
- Fill out the options listed above, replacing
DISCORD_TOKENwith the one we got in step 4 andCHANNEL_IDwith the one we got in step 14. - Your base configuration is complete! If you are just looking for a basic bridge, you can stop here. Otherwise, continue to the Extra Setup section.